Thursday, 8 October 2020
Hardware and Software Requirement


This instructable will cover the assembly of a personal computer. I will leave out what parts to pick because that is all dependent on the purpose for your specific computer. The computer I am assembling is one that I have been upgrading for the past two years. I needed to install it into a new case and decided to document the process to help others.
The order I used to assemble in can be changed depending on the circumstance of your build, ie. case, CPU cooler, special components, dimension restrictions, newer technology.
This specific computer was designed around Folding@Home and gaming as well as just having a powerful system for new software and things to come.
This specific computer was designed around Folding@Home and gaming as well as just having a powerful system for new software and things to come.
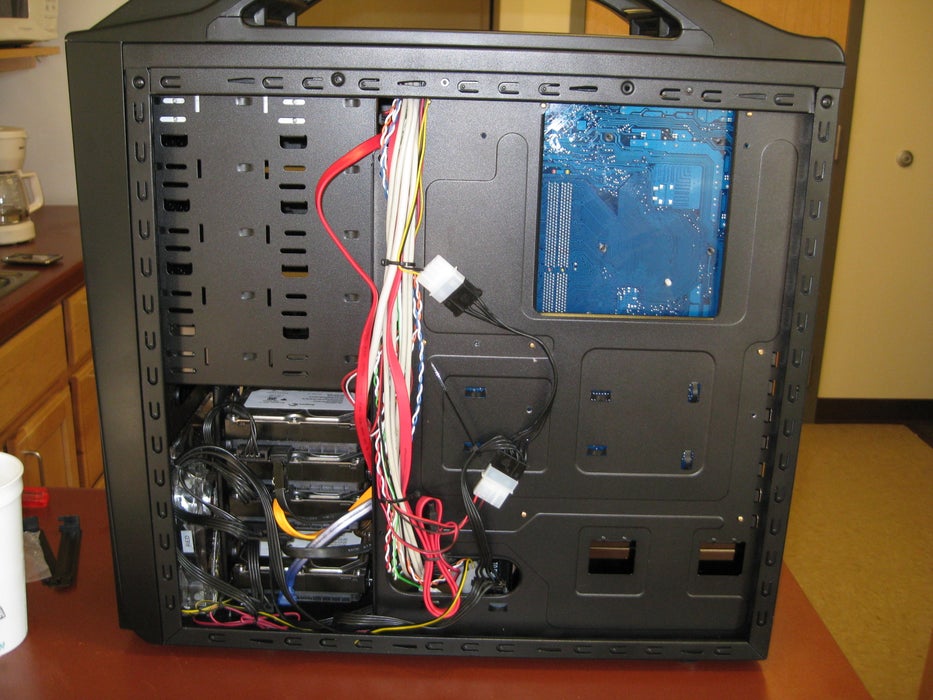
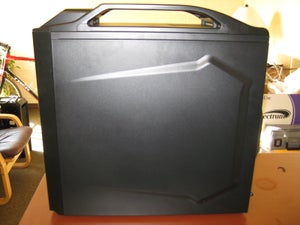
Step 1: Step 1: Remove Side Panels on Case

After removing the case from the box, the panels are removed from this case with thumb screws. Your specific model's manual will have more information if you are unsure for your case.
Included were standoffs for mounting the motherboard, following the included template, thread into the corresponding holes in the case.
Step 2: Step 2: Insert Motherboard
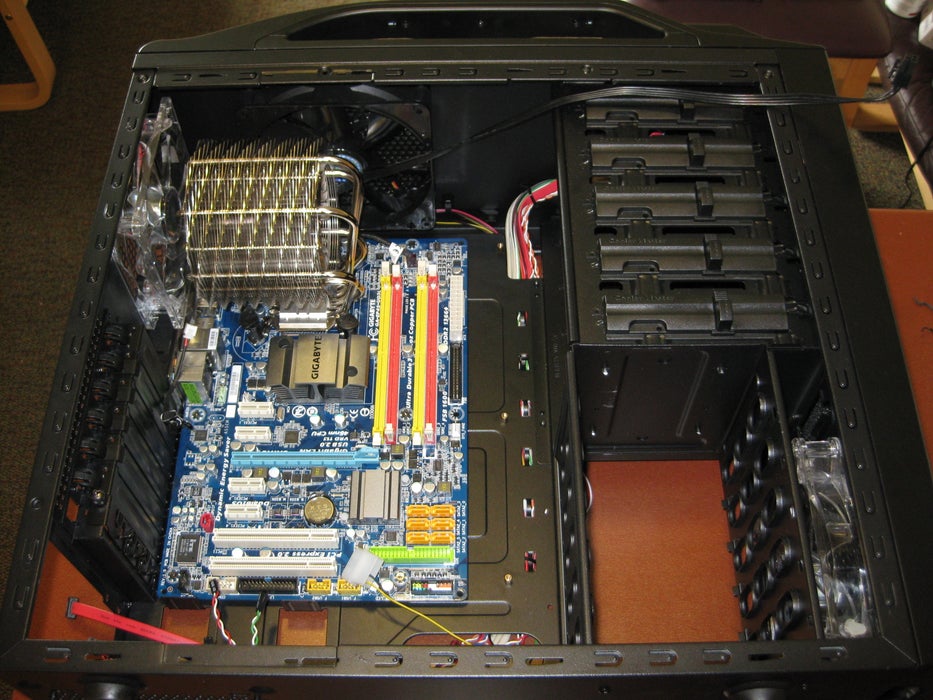
In my assembly process, as I was just transferring the parts from one case to another, leaving the CPU cooler installed was the easiest option. Depending on the motherboard, case, CPU and CPU fan, this might need to be done before installing or once in place.
Before setting the board in, the I/O panel faceplate needs to be snapped into the location in the back of the case. Be sure to orient it to the board.
Once the board is resting in the case, line up the first hole, I suggest a corner. Do not tighten all the way down until all screws are started so that the others will line up.
After all are in and tightened, there should be little or no deflection of the board if you gently press on it. It is advisable that any place there is a mounting location for the board, that it is screwed into a standoff. This will provide support while installing the components into the motherboard.
This case has a cutout for access to the back of the motherboard for the massive CPU coolers that have brackets that attach to the back of the board.
Step 3: Step 3: Check Clearances
Being that this computer includes high performance components, some of them are large enough that clearance can become an issue. For this reason once the board was installed I fitted the graphics card so there would not be more surprises later in the process.
Step 4: Step 4: Front Panel Connections


Once the graphics card was removed again, it is time to attach the connections for the buttons, lights, USB ports and audio connections. As every case and motherboard differ slightly, it is best to refer to the manual for the placement and orientation of connections. Some of these connections are made to only work in one direction so be careful when using force, it might be in an incorrect orientation.
Step 5: Step 5: Install Power Supply
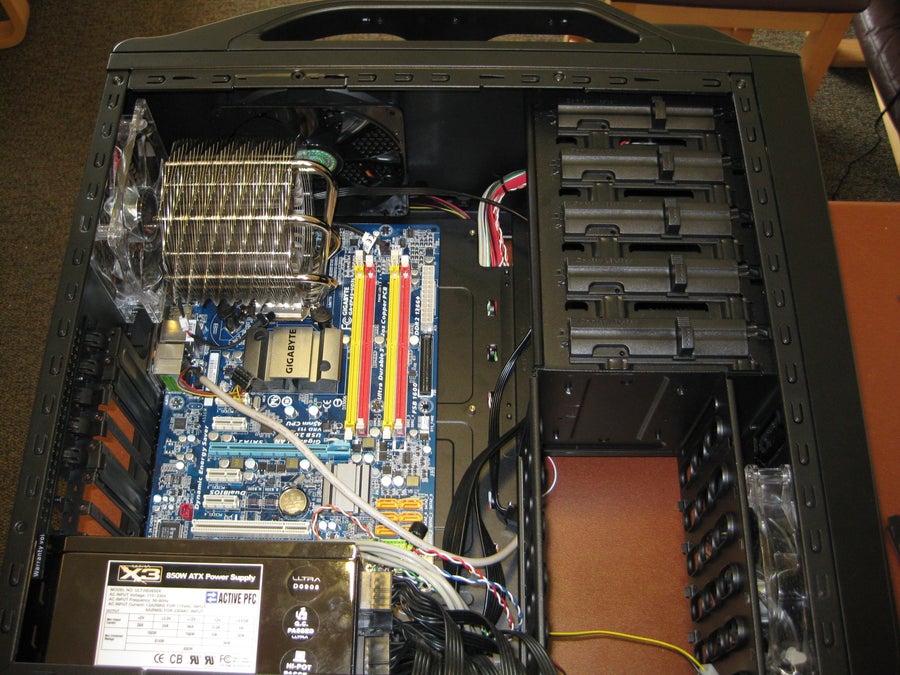

The power supply from the previous case was modular so only the cables that are needed are plugged into the unit. As well this makes cable management cleaner in the end. Normally the supply is screwed into the back panel by 4 screws, though some cases include a clamp to hold it down that way.
The second picture shows all of the cables that my computer needs to function properly.
Not pictured, below the supply there is a hole with filter for the power supply to circulate air independent of the case fans.
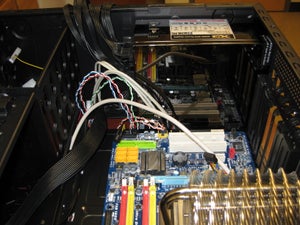
Step 6: Step 6: Power Motherboard
With the motherboard power being the largest cable and sometimes just long enough, I suggest running this cable first and plugging it into the board, if there is a second cable for the CPU remember to connect it as well.
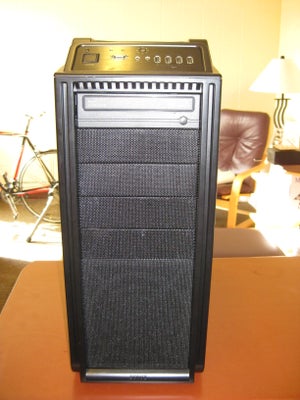
Step 7: Step 7: Installing Optical Drive
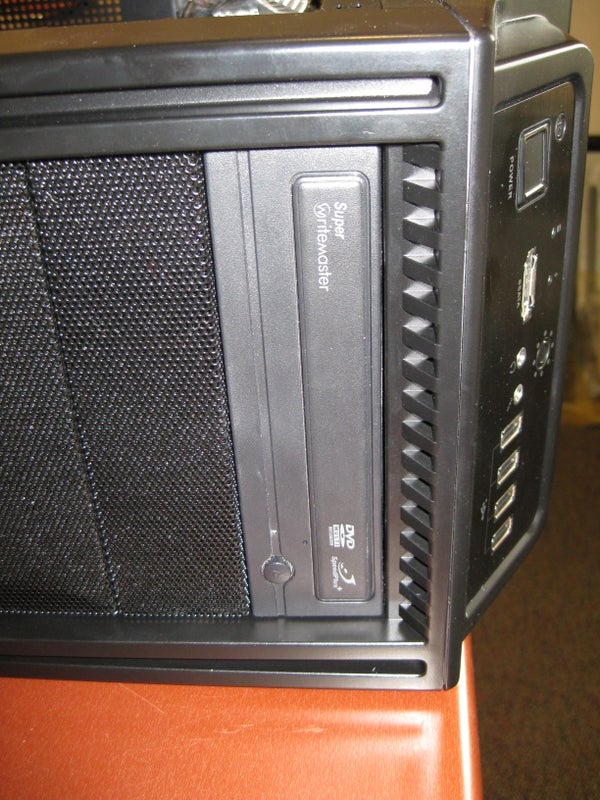
The optical drive for this computer is a DVD/CD read/write combo. Some people prefer to only connect an optical drive when installing items but one being in place at all times comes in handy when something comes up and you do not want to open the case and connect the drive.
The second picture shows the tool-less design of the case to hold the drive in place.
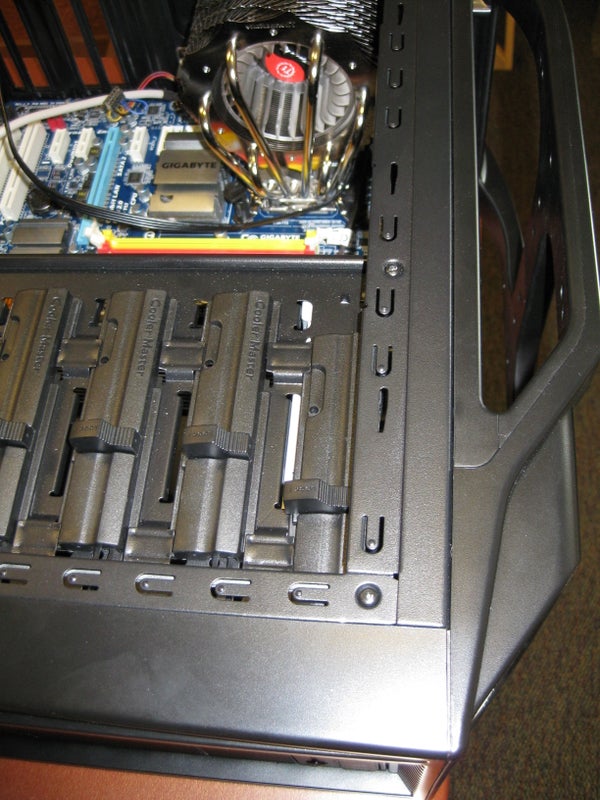
Step 8: Step 8: Installing the Hard Drives
The size and number of hard drives your computer contains is completely dependent on your style of use and storage needs. This computer uses 4 drives, two in raid and the rest for a main drive and miscellaneous storage.
Picture 2 shows the location for the drives in the case, this model has a cross mounted design, others might have them in the same direction as the optical drive installed previously.
Picture 3 is an example of possible tool-less drive mounting hardware, this clips allow the drive to be just slid in and lock into place.
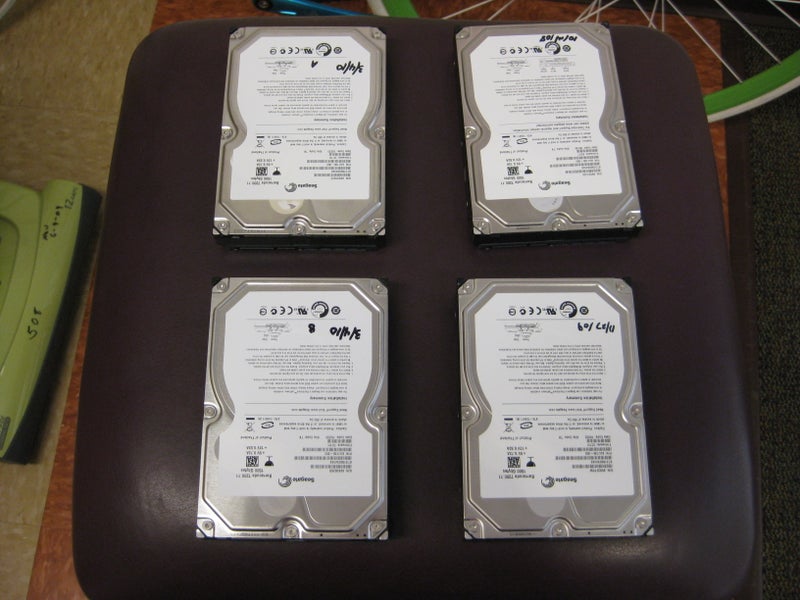
Picture 4 depicts the drives installed and spaced out for air flow. This is very important to extend the lifespan of the drive, key when you are making a long term investment or run your computer continuously.
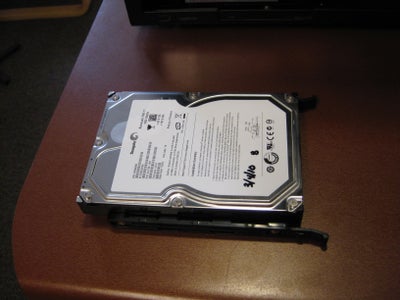
Picture 5 shows the back of the drives where the connections for power and signal are made.
Picture 6 shows the cables attached.
Step 9: Step 9: Connect Cables
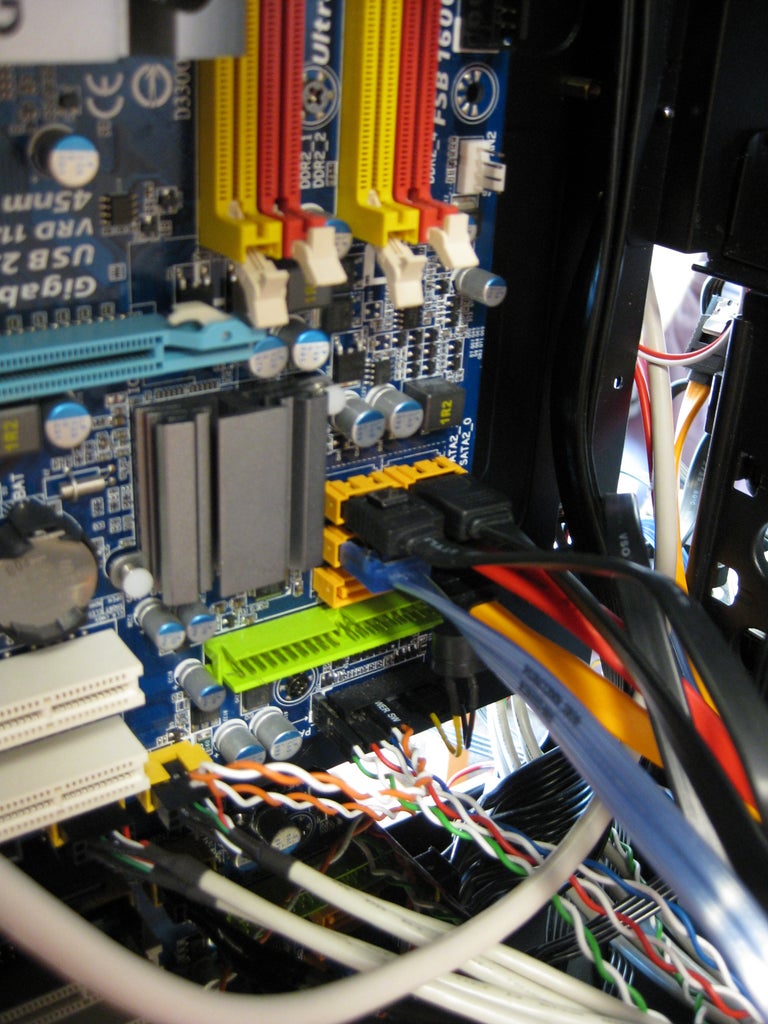
It is time to connect the cables for the hard drives and optical drives. The cables are keyed so they will only fit in one direction into the board, don't forget the cable that is attached to the optical drive. This computer does not use the IDE cable but if you are connecting an older optical or hard drive they might require it.
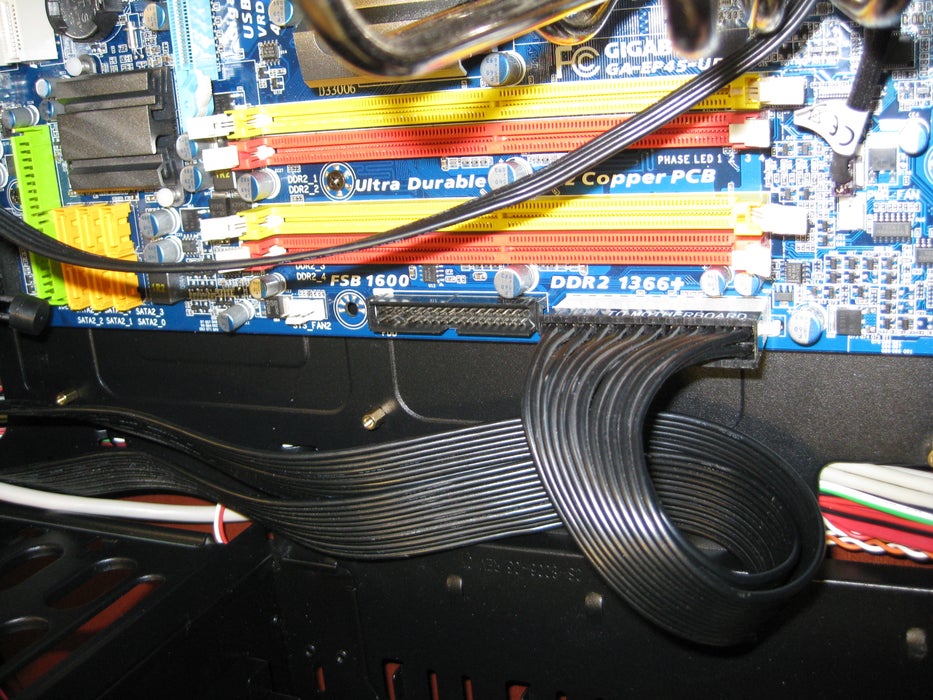
Step 10: Step 10: Install RAM
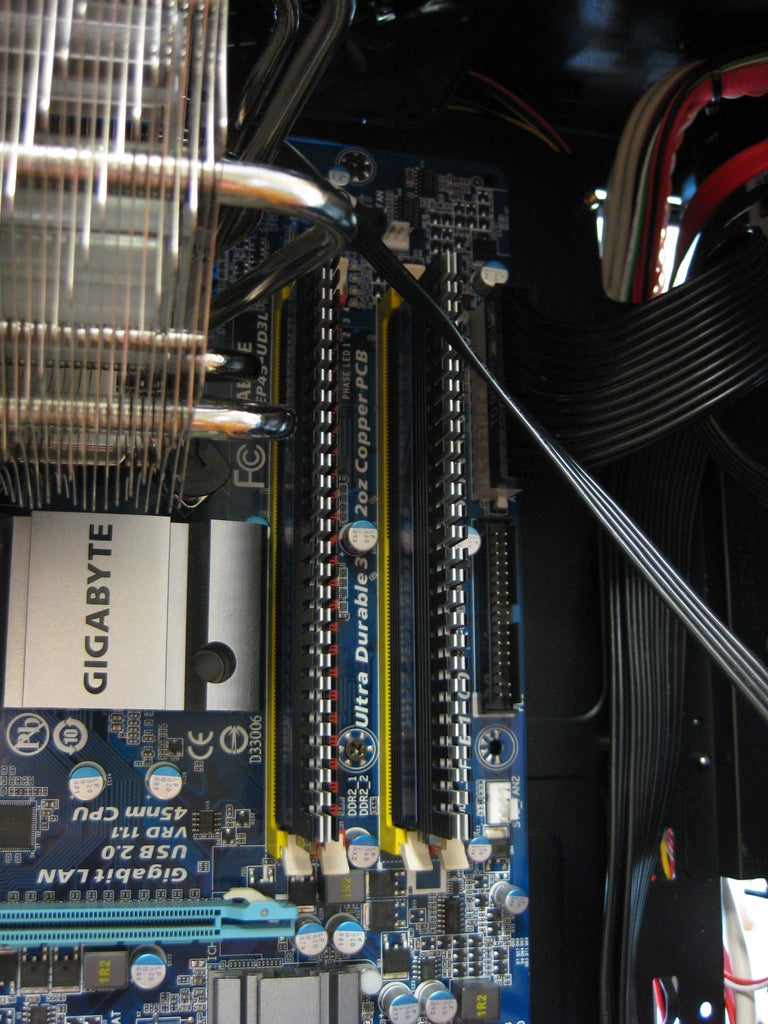
It is time for the ram to be inserted. If your computer uses more than one stick like mine, refer to the manual for which slot to install the stick. If only one stick is going to be inserted, place it in the slot closest to the CPU.
The slots are keyed as are the RAM sticks, so make sure the notch is lined up. Even correctly lined up it will take considerable force, this is where having those standoffs in the correct spots pays off. Having done this for several computers, I still get uneasy pushing so hard on electronics.
You will know when they are set firmly as the locking tabs will snap into place and hold the RAM firmly in the slot.
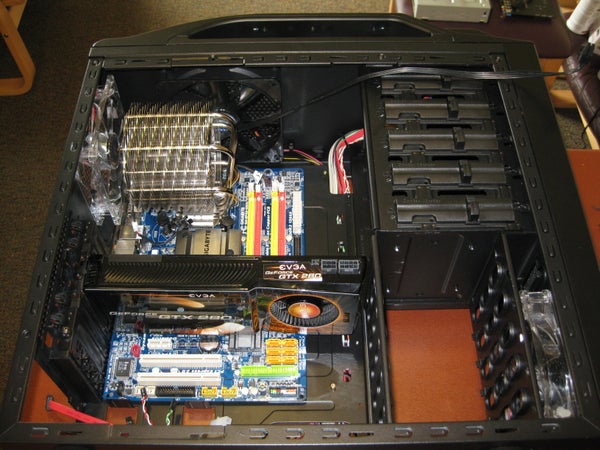
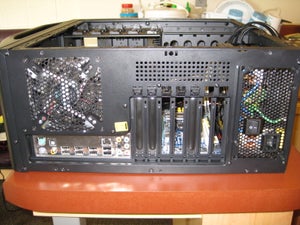
Step 11: Step 11: Install Graphics Card and Expansion Cards
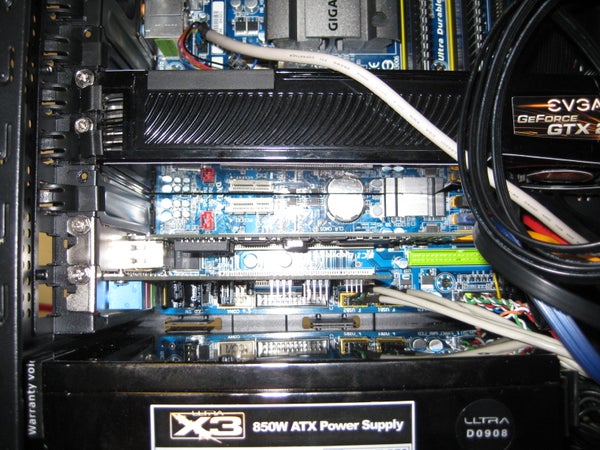
If your computer does not come with a graphics card integrated into the motherboard or you are adding an additional card, this is the time to do so.
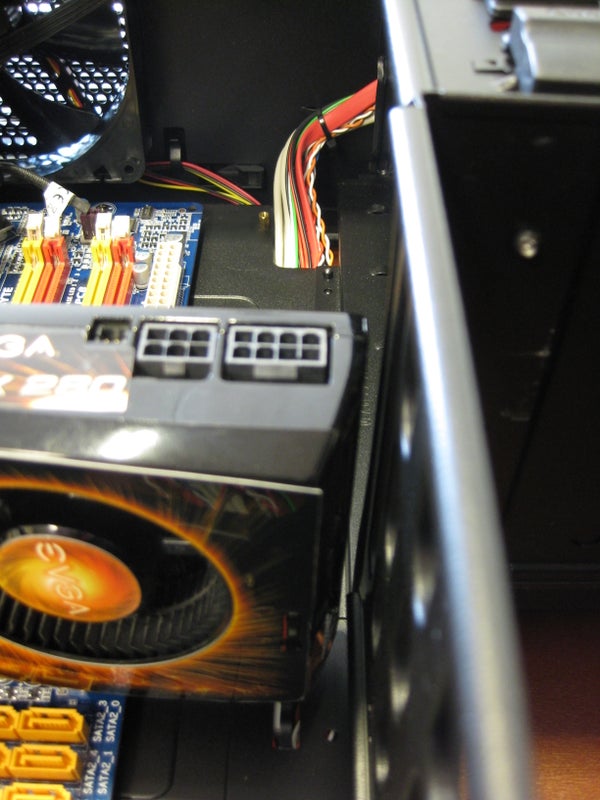
With some high performance cards, additional power cables might need to be installed. The manual for the card should tell you how many cables are needed. In my case it is a 6-pin and an 8-pin.
After that is in place and secured with screws in place (a time where tool-less is not enough), the network card and audio card for the computer are connected into the slots below the graphics card.
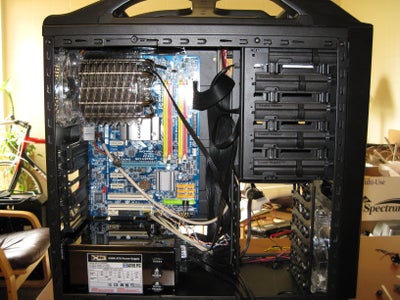
Step 12: Step 12: Cable Management
With all components in place, it is time to make your hard work look like a work of art. Hiding cables and organizing them will help in the future if you are looking for high airflow through the case or to light it up.
Small steps taken through out the process of installing the components can pay of huge at this point by not needing to re-run the cables around brackets or through holes in the frame. Some of the management was done out of the box for this model being that the front panel and fan cables were already secured ahead of time. Another thing to think of is that the back panel does not leave a large space if you have several cables running over the top of others.
A few trial and error steps later this will look and perform with ease. Also, it is a nice point to brag once you call up your friends to show off the system you assembled with your own hands.
This step is also when fans and lights can be connected.
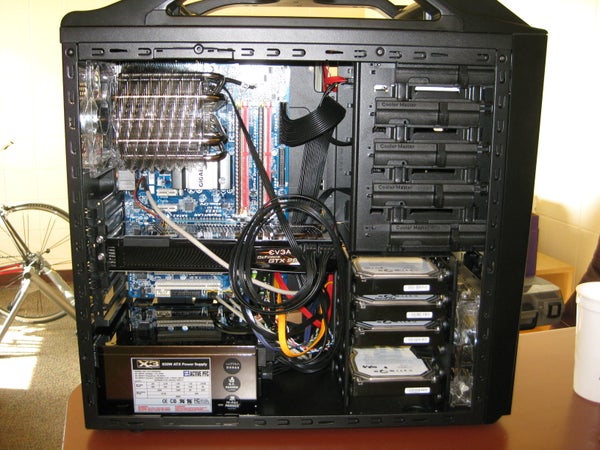
Step 13: Final Product
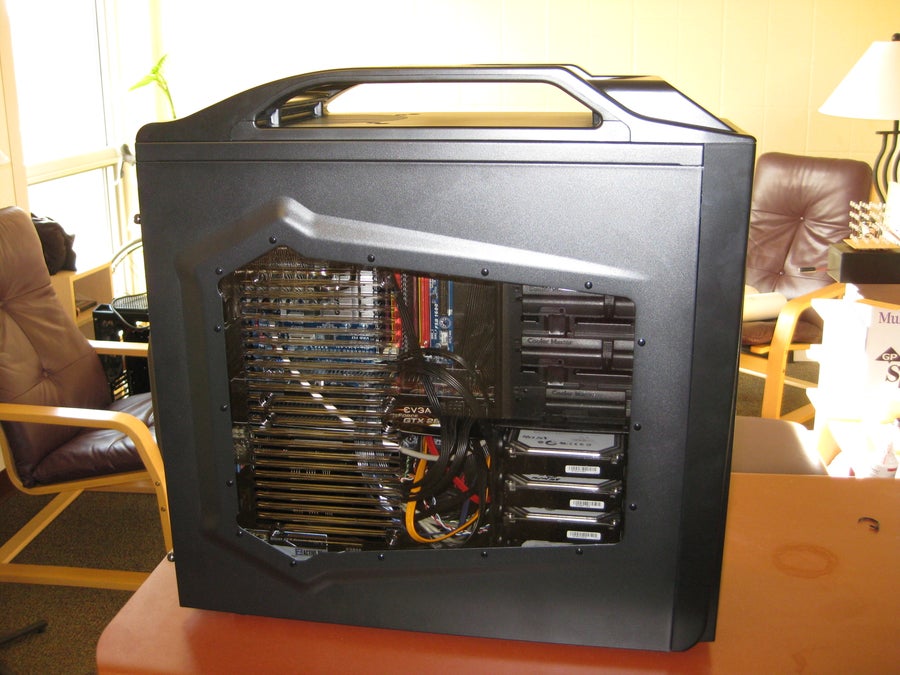
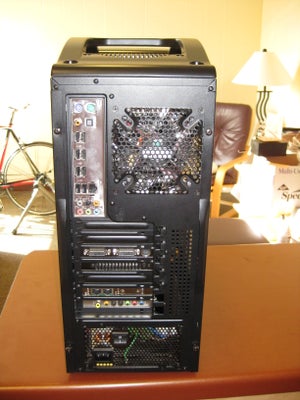
The assembly of a brand new computer can take several hours. Just to remove and mount in a new case with no other modifications took me 3 hours, 2.5 of that just the re-installing time.
With the job complete it is time to fire it up and enjoy your creation. From here you can add your operating system and software as you see fit.
Hope this helps you. Leave a comment if there are questions you still have that were not covered.
Software and Hardware Requirements
All computer software needs certain hardware components or other software resources to be present on a computer. These prerequisites are known as (computer) system requirements and are often used as a guideline as opposed to an absolute rule. Most software defines two sets of system requirements: minimum and recommended. With increasing demand for higher processing power and resources in newer versions of software, system requirements tend to increase over time. Industry analysts suggest that this trend plays a bigger part in driving upgrades to existing computer systems than technological advancements.
Hardware requirements
The most common set of requirements defined by any operating system or software application is the physical computer resources, also known as hardware, A hardware requirements list is often accompanied by a hardware compatibility list (HCL), especially in case of operating systems. An HCL lists tested, compatible, and sometimes incompatible hardware devices for a particular operating system or application. The following sub-sections discuss the various aspects of hardware requirements.
Architecture – All computer operating systems are designed for a particular computer architecture. Most software applications are limited to particular operating systems running on particular architectures. Although architecture-independent operating systems and applications exist, most need to be recompiled to run on a new architecture. See also a list of common operating systems and their supporting architectures.
Processing power – The power of the central processing unit (CPU) is a fundamental system requirement for any software. Most software running on x86 architecture define processing power as the model and the clock speed of the CPU. Many other features of a CPU that influence its speed and power, like bus speed, cache, and MIPS are often ignored. This definition of power is often erroneous, as AMD Athlon and Intel Pentium CPUs at similar clock speed often have different throughput speeds. Intel Pentium CPUs have enjoyed a considerable degree of popularity, and are often mentioned in this category.
Memory – All software, when run, resides in the random access memory (RAM) of a computer. Memory requirements are defined after considering demands of the application, operating system, supporting software and files, and other running processes. Optimal performance of other unrelated software running on a multi-tasking computer system is also considered when defining this requirement.
Secondary storage – Hard-disk requirements vary, depending on the size of software installation, temporary files created and maintained while installing or running the software, and possible use of swap space (if RAM is insufficient).
Display adapter – Software requiring a better than average computer graphics display, like graphics editors and high-end games, often define high-end display adapters in the system requirements.
Peripherals – Some software applications need to make extensive and/or special use of some peripherals, demanding the higher performance or functionality of such peripherals. Such peripherals include CD-ROM drives, keyboards, pointing devices, network devices, etc.
Software requirements
Software requirements deal with defining software resource requirements and prerequisites that need to be installed on a computer to provide optimal functioning of an application. These requirements or prerequisites are generally not included in the software installation package and need to be installed separately before the software is installed.
Platform – In computing, a platform describes some sort of framework, either in hardware or software, which allows software to run. Typical platforms include a computer’s architecture, operating system, or programming languages and their runtime libraries.
Operating system is one of the first requirements mentioned when defining system requirements (software). Software may not be compatible with different versions of same line of operating systems, although some measure of backward compatibility is often maintained. For example, most software designed for Microsoft Windows XP does not run on Microsoft Windows 98, although the converse is not always true. Similarly, software designed using newer features of Linux Kernel v2.6 generally does not run or compile properly (or at all) on Linux distributions using Kernel v2.2 or v2.4.
APIs and drivers – Software making extensive use of special hardware devices, like high-end display adapters, needs special API or newer device drivers. A good example is DirectX, which is a collection of APIs for handling tasks related to multimedia, especially game programming, on Microsoft platforms.
Web browser – Most web applications and software depending heavily on Internet technologies make use of the default browser installed on system. Microsoft Internet Explorer is a frequent choice of software running on Microsoft Windows, which makes use of ActiveX controls, despite their vulnerabilities.
Perform an in-place upgrade to Windows 10 using Configuration Manager
Applies to
- Windows 10
The simplest path to upgrade PCs currently running Windows 7, Windows 8, or Windows 8.1 to Windows 10 is through an in-place upgrade. You can use a Microsoft Endpoint Configuration Manager task sequence to completely automate the process.
Important
Beginning with Windows 10 and Windows Server 2016, Windows Defender is already installed. A management client for Windows Defender is also installed automatically if the Configuration Manager client is installed. However, previous Windows operating systems installed the System Center Endpoint Protection (SCEP) client with the Configuration Manager client. The SCEP client can block in-place upgrade to Windows 10 due to incompatibility, and must be removed from a device before performing an in-place upgrade to Windows 10.
Infrastructure
An existing Configuration Manager infrastructure that is integrated with MDT is used for the following procedures. For more information about the setup for this article, see Prepare for Zero Touch Installation of Windows 10 with Configuration Manager.
For the purposes of this article, we will use one server computer (CM01) and one client computers (PC0004).
- CM01 is a domain member server and Configuration Manager software distribution point. In this guide CM01 is a standalone primary site server.
- PC0004 is a domain member client computer running Windows 7 SP1, or a later version of Windows, with the Configuration Manager client installed, that will be upgraded to Windows 10.
All servers are running Windows Server 2019. However, an earlier, supported version of Windows Server can also be used.
All server and client computers referenced in this guide are on the same subnet. This is not required, but each server and client computer must be able to connect to each other to share files, and to resolve all DNS names and Active Directory information for the contoso.com domain. Internet connectivity is also required to download OS and application updates.
Add an OS upgrade package
Configuration Manager Current Branch includes a native in-place upgrade task. This task sequence differs from the MDT in-place upgrade task sequence in that it does not use a default OS image, but rather uses an OS upgrade package.
On CM01:
- Using the Configuration Manager console, in the Software Library workspace, expand Operating Systems, right-click Operating System Upgrade Packages, and click Add Operating System Upgrade Package.
- On the Data Source page, under Path, click Browse and enter the UNC path to your media source. In this example, we have extracted the Windows 10 installation media to \\cm01\Sources$\OSD\UpgradePackages\Windows 10.
- If you have multiple image indexes in the installation media, select Extract a specific image index from install.wim... and choose the image index you want from the dropdown menu. In this example, we have chosen Windows 10 Enterprise.
- Next to Architecture, select x64, choose a language from the dropdown menu next to Language, and then click Next.
- Next to Name, enter Windows 10 x64 RTM and then complete the wizard by clicking Next and Close.
- Distribute the OS upgrade package to the CM01 distribution point by right-clicking the Windows 10 x64 RTM OS upgrade package and then clicking Distribute Content.
- In the Distribute Content Wizard, add the CM01 distribution point, click Next and click Close.
- View the content status for the Windows 10 x64 RTM upgrade package. Do not continue until the distribution is completed (it might take a few minutes). You also can review the D:\Program Files\Microsoft Configuration Manager\Logs\distmgr.log file and look for the STATMSG: ID=2301 line.
Create an in-place upgrade task sequence
On CM01:
Using the Configuration Manager console, in the Software Library workspace, expand Operating Systems, right-click Task Sequences, and select Create Task Sequence.
On the Create a new task sequence page, select Upgrade an operating system from an upgrade package and click Next.
Use the following settings to complete the wizard:
- Task sequence name: Upgrade Task Sequence
- Description: In-place upgrade
- Upgrade package: Windows 10 x64 RTM
- Include software updates: Do not install any software updates
- Install applications: OSD \ Adobe Acrobat Reader DC
Complete the wizard, and click Close.
Review the Upgrade Task Sequence.
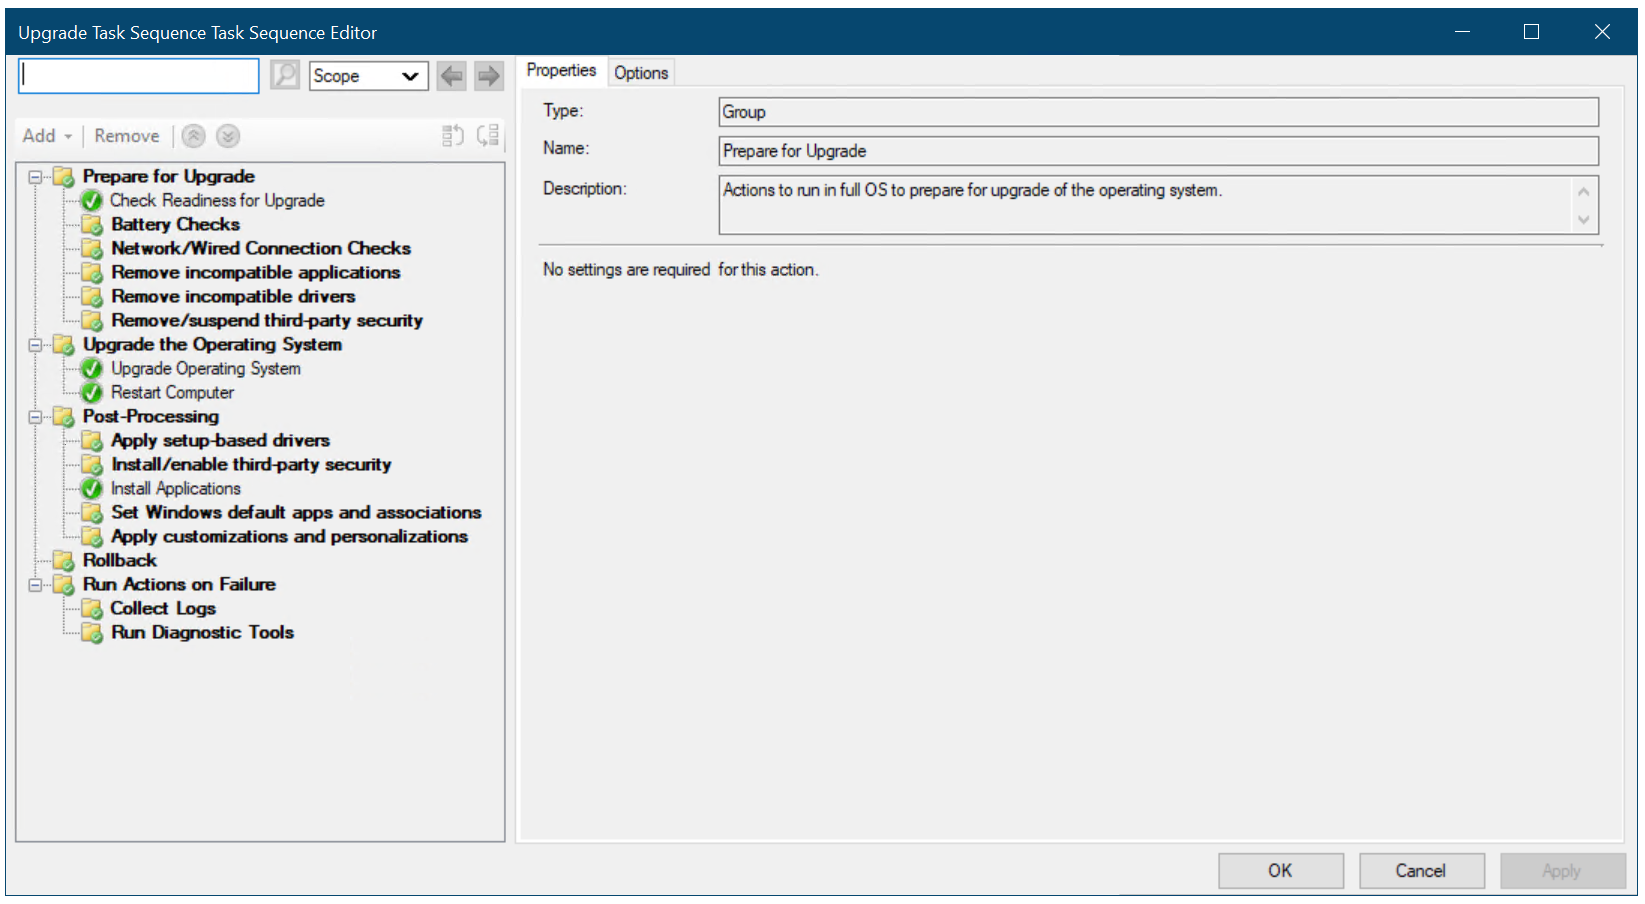
The Configuration Manager upgrade task sequence
Create a device collection
After you create the upgrade task sequence, you can create a collection to test a deployment. In this section, we assume you have the PC0004 computer running Windows 7 SP1, with the Configuration Manager client installed.
On CM01:
Using the Configuration Manager console, in the Asset and Compliance workspace, right-click Device Collections, and then select Create Device Collection. Use the following settings:
- General
- Name: Windows 10 x64 in-place upgrade
- Limited Collection: All Systems
- Membership rules:
- Direct rule
- Resource Class: System Resource
- Attribute Name: Name
- Value: PC0004
- Select Resources
- Select PC0004
- Direct rule
- General
Review the Windows 10 x64 in-place upgrade collection. Do not continue until you see PC0004 in the collection.
Deploy the Windows 10 upgrade
In this section, you create a deployment for the Windows 10 Enterprise x64 Update application.
On CM01:
- Using the Configuration Manager console, in the Software Library workspace, right-click the Upgrade Task Sequence task sequence, and then click Deploy.
- On the General page, browse and select the Windows 10 x64 in-place upgrade collection, and then click Next.
- On the Content page, click Next.
- On the Deployment Settings page, click Next:
- On the Scheduling page, accept the default settings, and then click Next.
- On the User Experience page, accept the default settings, and then click Next.
- On the Alerts page, accept the default settings, and then click Next.
- On the Distribution Points page, accept the default settings, and then click Next.
- On the Summary page, click Next, and then click Close.
Start the Windows 10 upgrade
Next, run the in-place upgrade task sequence on PC0004.
On PC0004:
Open the Configuration Manager control panel (control smscfgrc).
On the Actions tab, select Machine Policy Retrieval & Evaluation Cycle, click Run Now, and then click OK in the popup dialog box that appears.
Note
You also can use the Client Notification option in the Configuration Manager console, as shown in Refresh a Windows 7 SP1 client with Windows 10 using Configuration Manager.
Open the Software Center, select the Upgrade Task Sequence deployment and then click Install.
Confirm you want to upgrade the operating system on this computer by clicking Install again.
Allow the Upgrade Task Sequence to complete. The PC0004 computer will download the install.wim file, perform an in-place upgrade, and install your added applications. See the following examples:
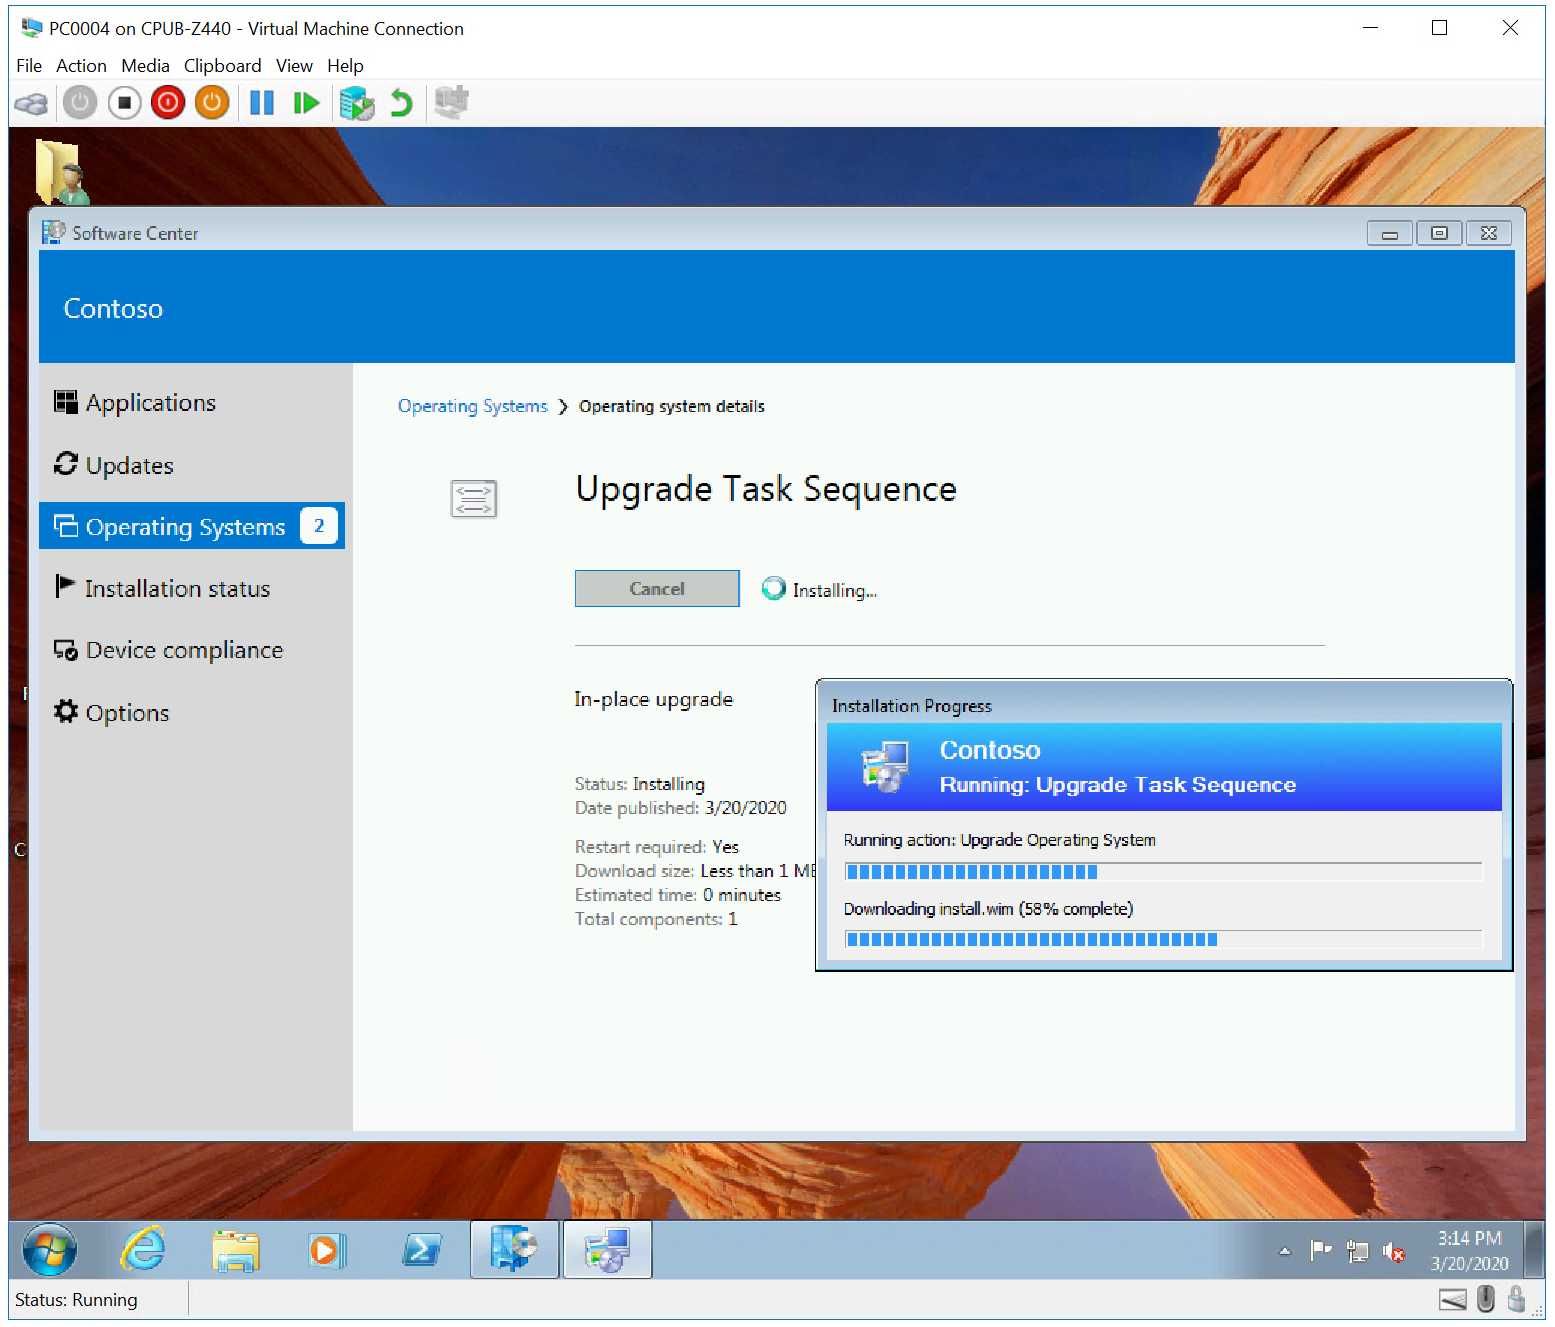

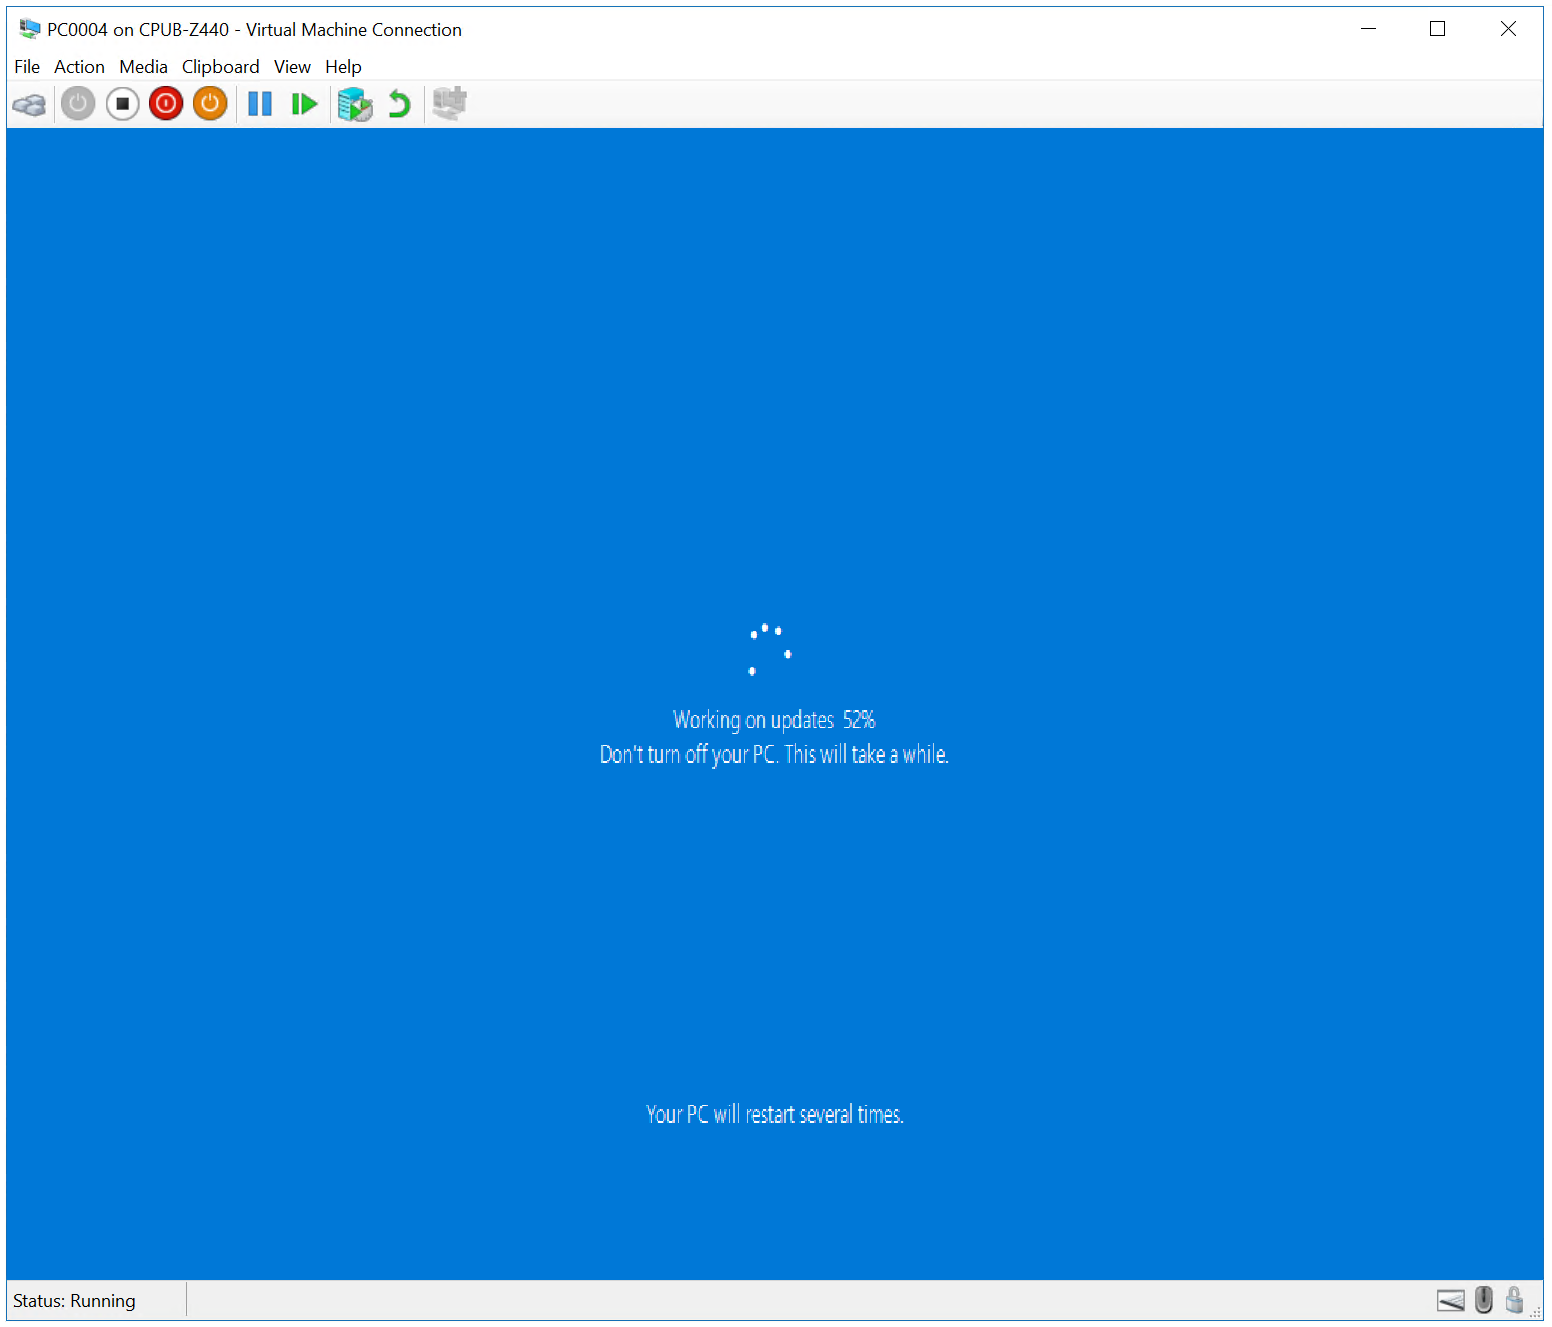
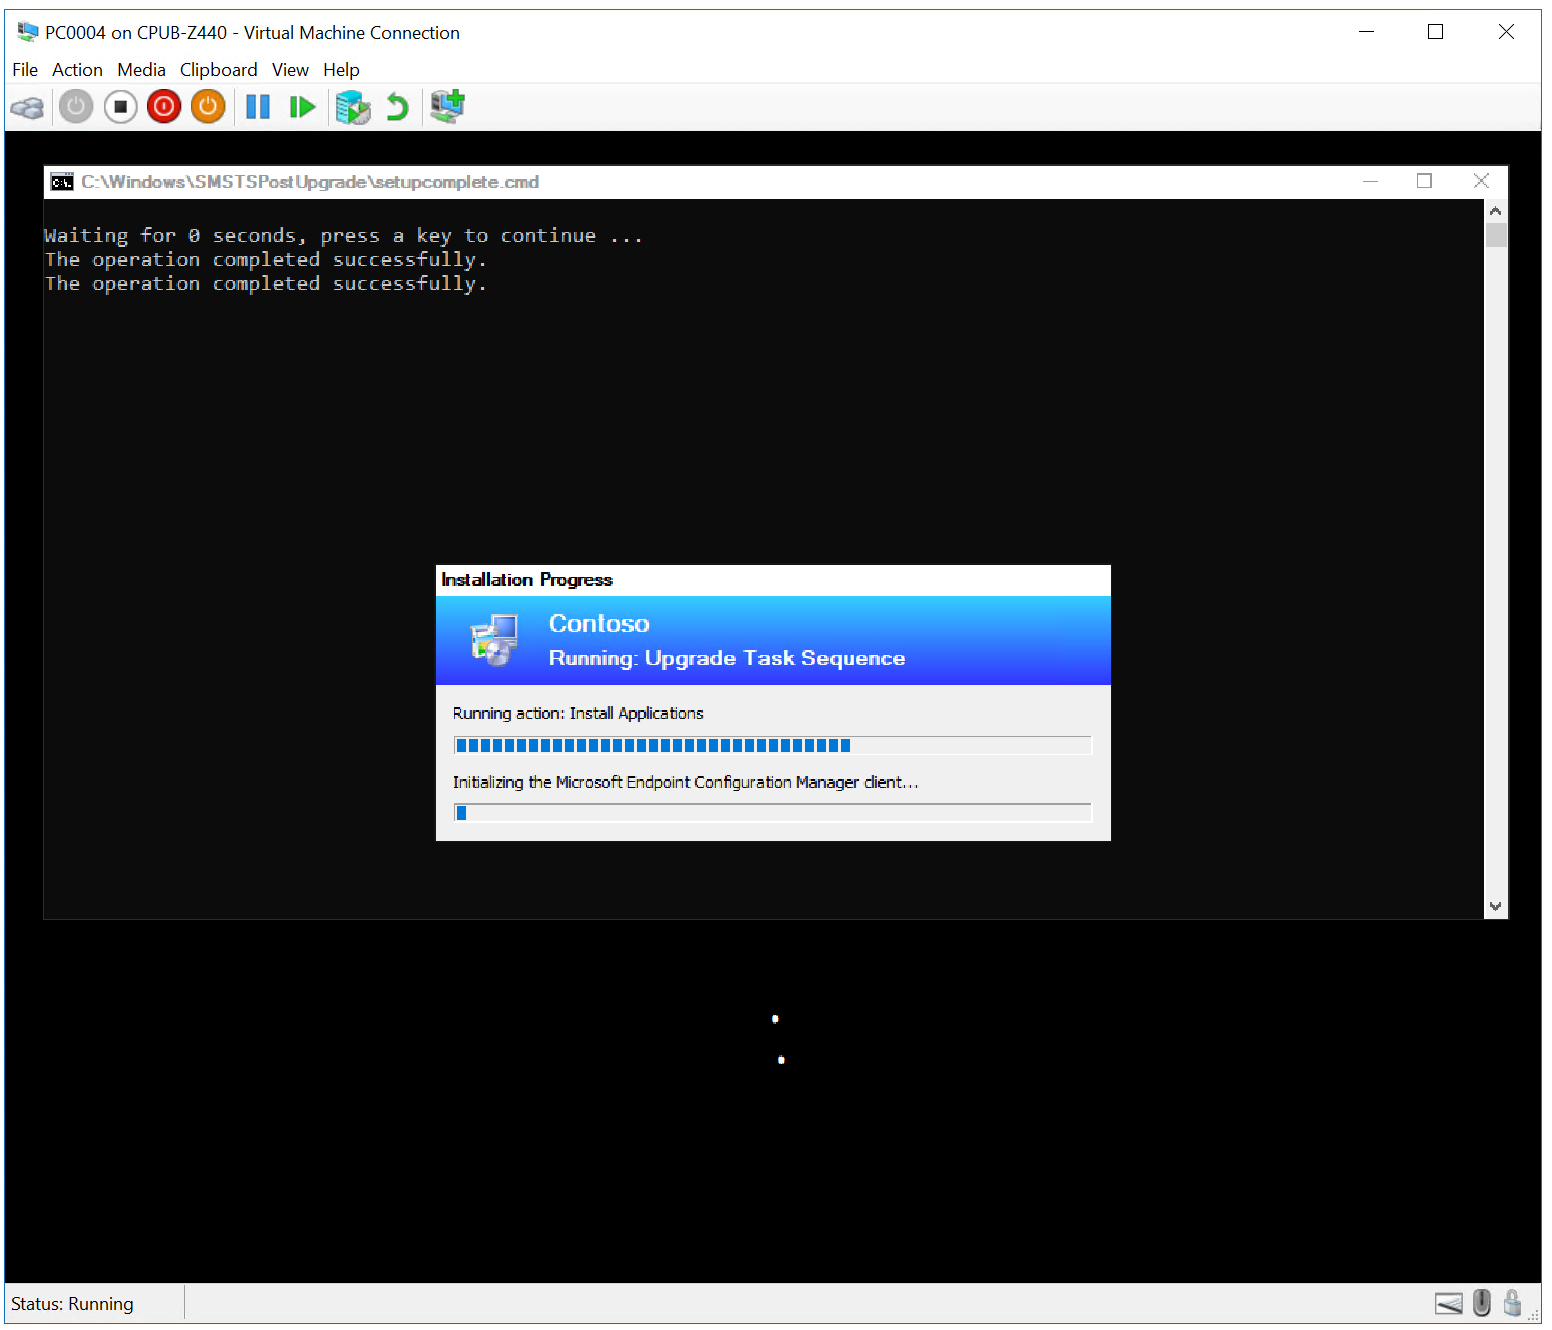
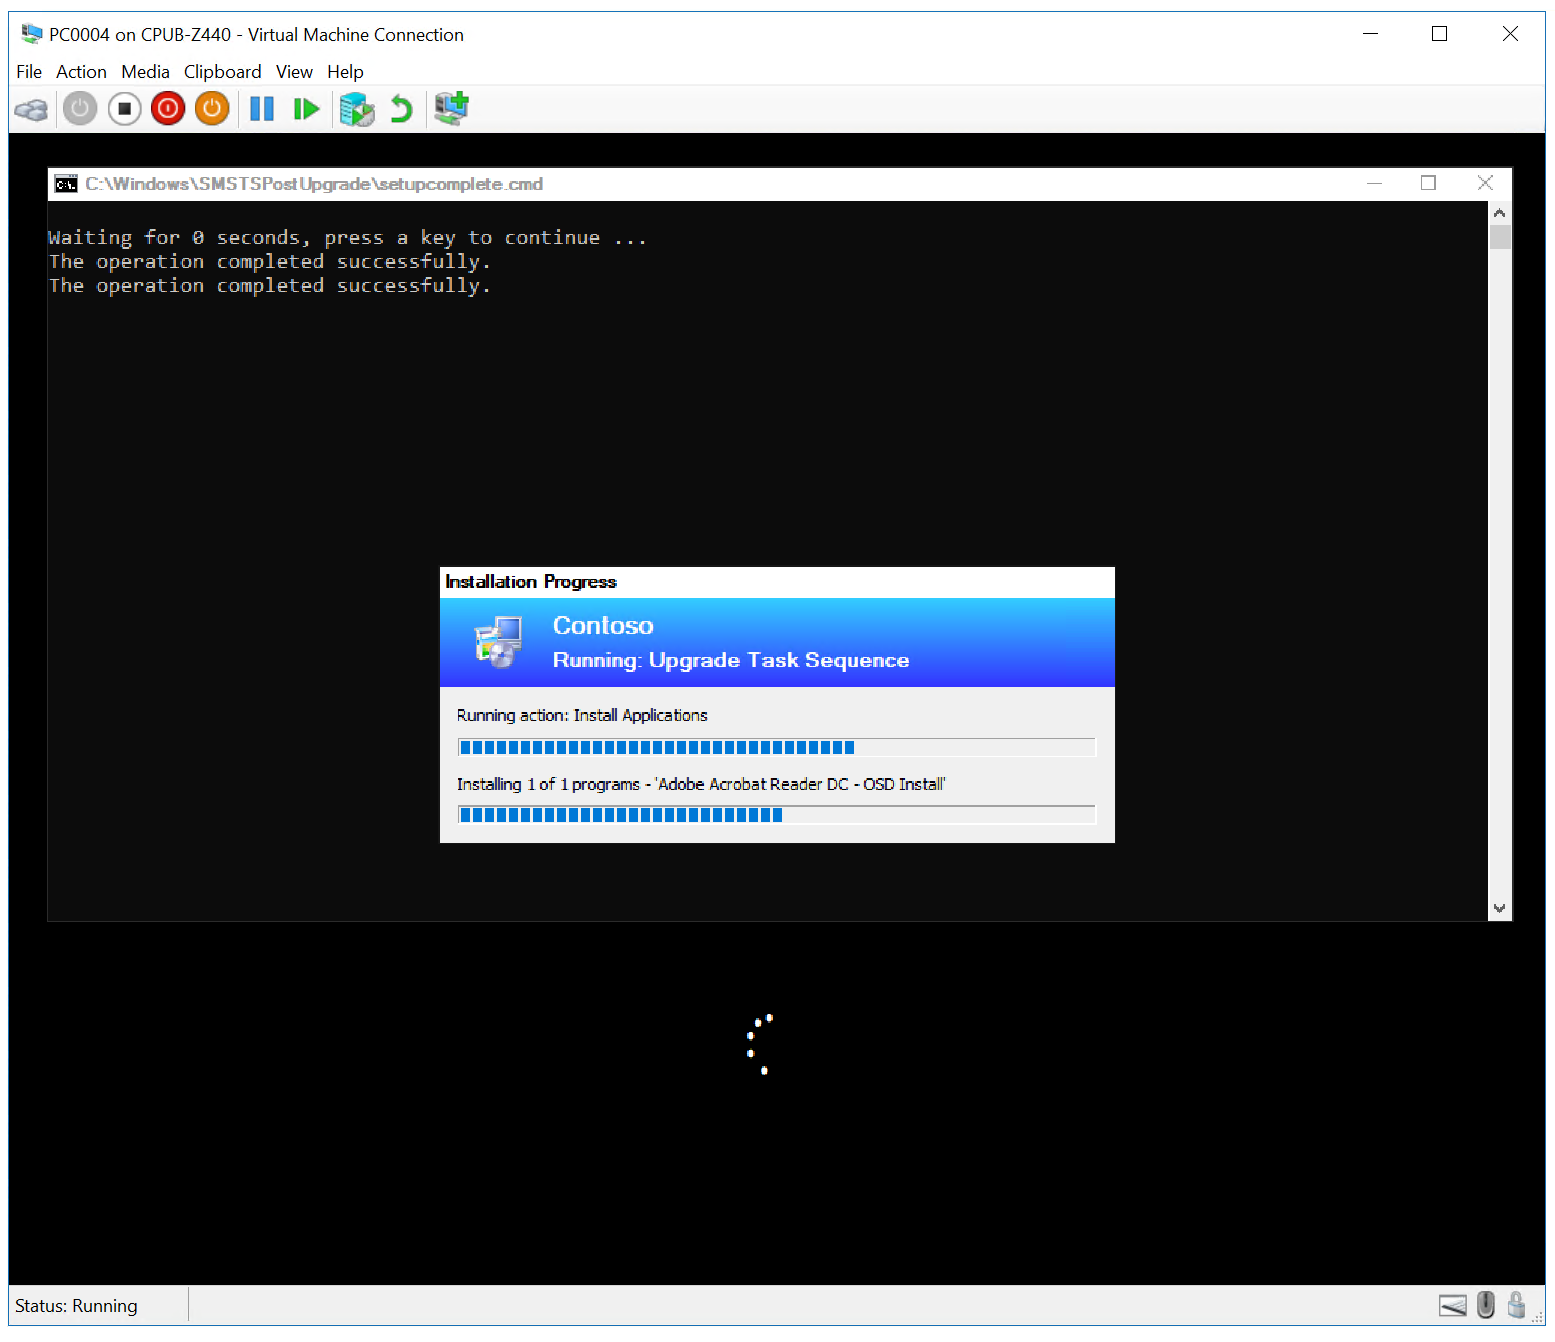
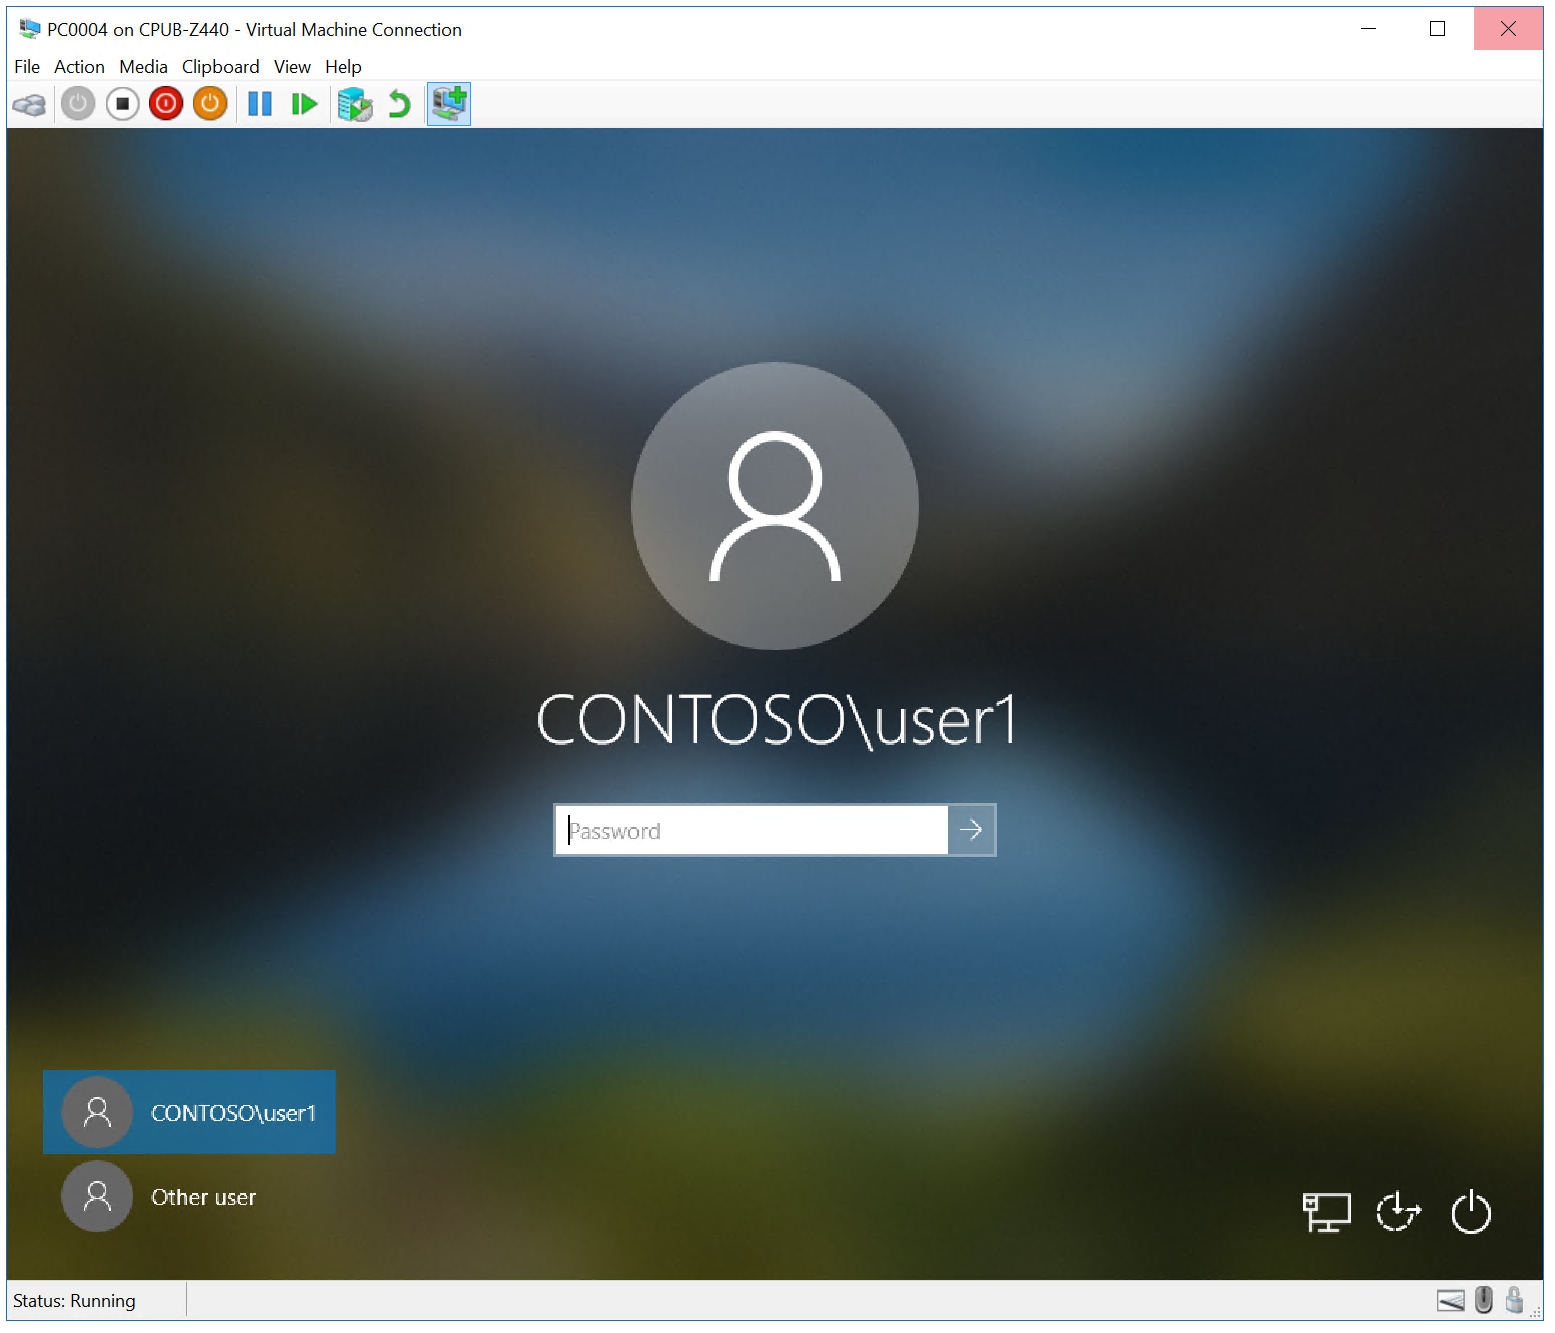
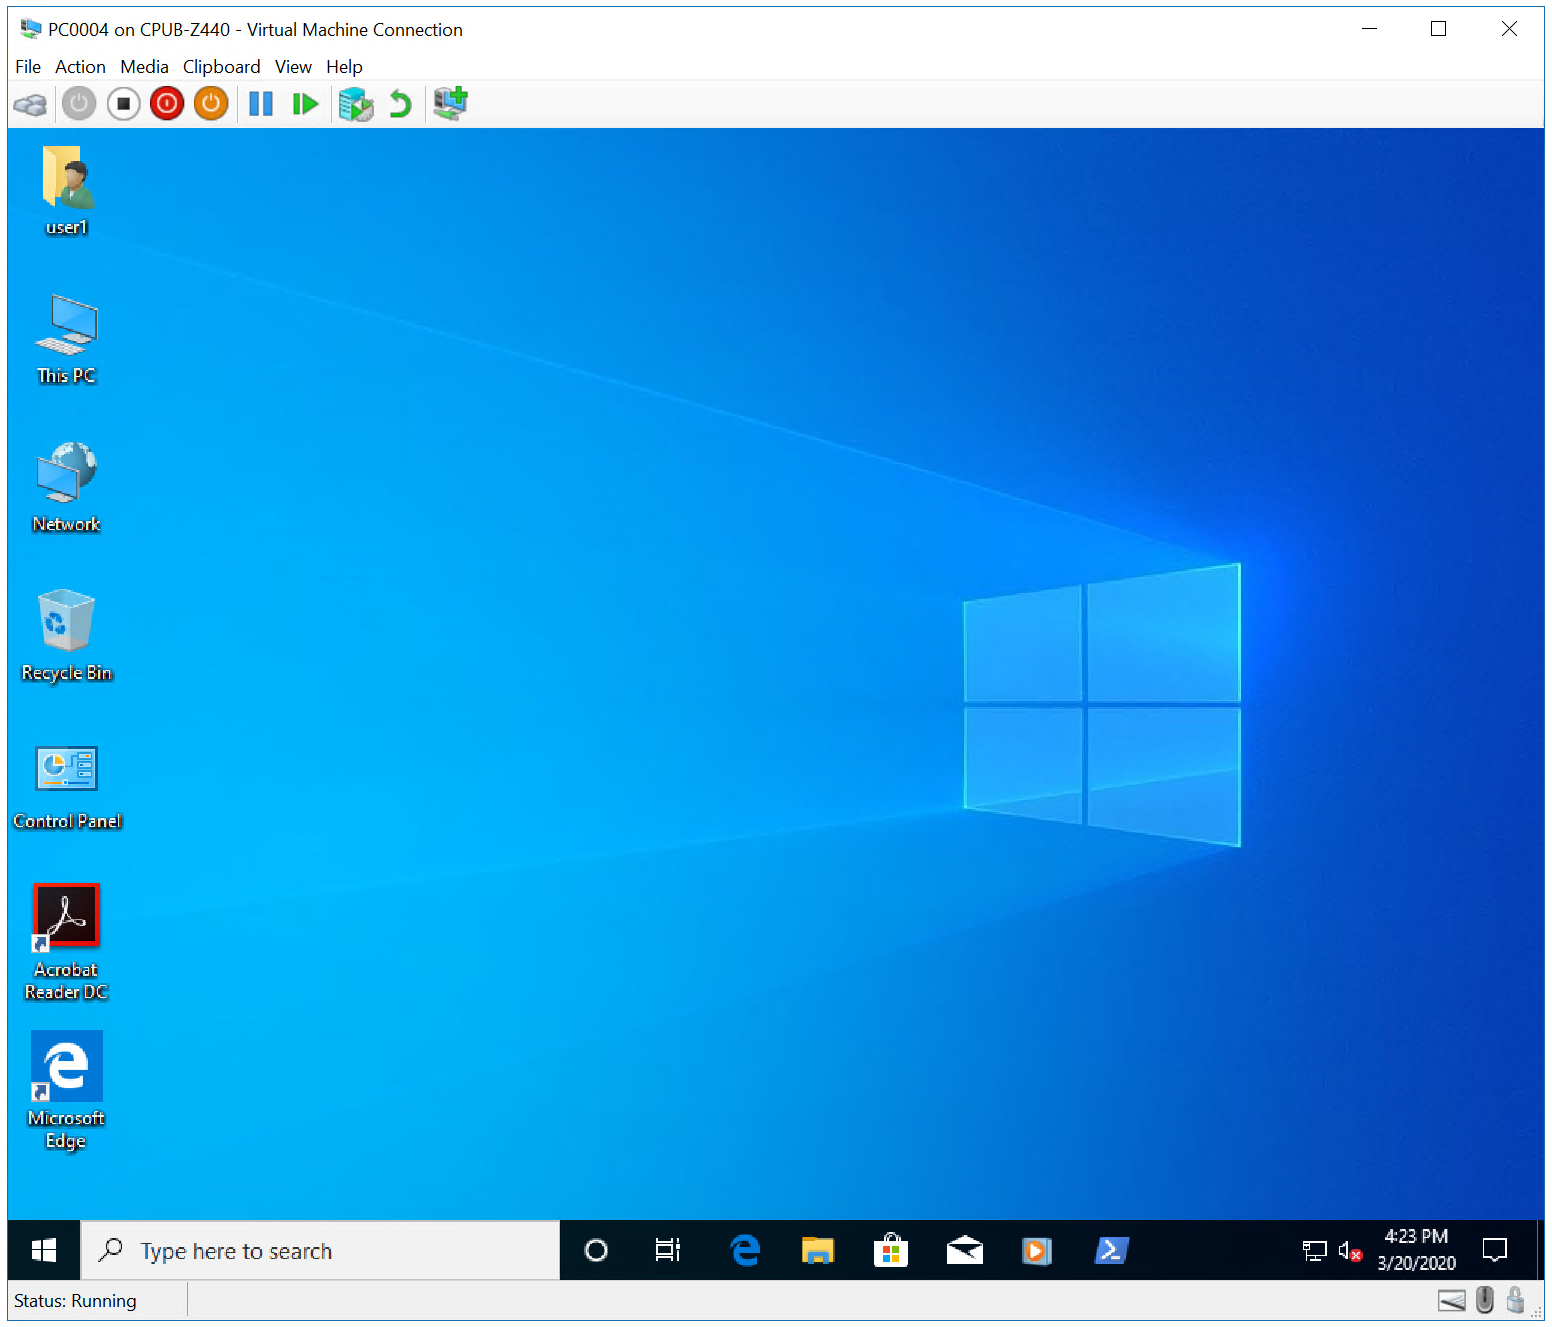
In-place upgrade with Configuration Manager
Subscribe to:
Comments (Atom)